
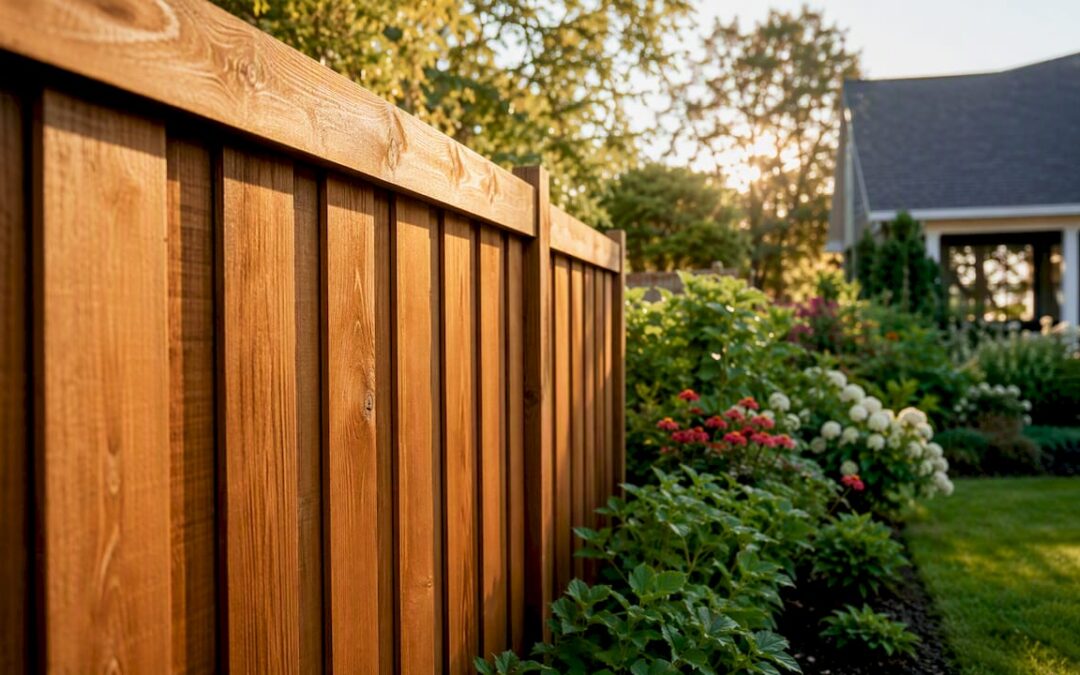
A board-on-board fence is a privacy fence built by overlapping vertical boards on alternating faces of horizontal rails, so no gap ever opens between pickets. It’s the go-to choice when you want complete visual screening and a finished, attractive appearance from both sides of the fence line.
- Privacy: Overlapping boards cover any gap that forms as wood shrinks, giving you continuous privacy that a standard stockade fence can’t guarantee over time. Fence Advisors rates board-on-board at 10/10 for privacy, the highest score of any wood privacy style.
- Trade-off: Expect to pay more. Installed cedar board-on-board typically runs $30–$50 per linear foot, and the style uses roughly 30% more pickets than a comparable stockade build.
- Materials: Cedar, pressure-treated pine, and WPC/composite are the three most common choices, each with different maintenance demands and lifespans.
Modernfence has installed board-on-board fences across Western Arkansas and Eastern Oklahoma for over 70 years. The guidance below covers everything from construction basics to material trade-offs and contractor questions.
Key Takeaways
Board-on-board fencing delivers the highest privacy rating of any wood style, but it costs more and demands more maintenance than simpler alternatives.
| Point | Details |
|---|---|
| Privacy performance | Board-on-board earns a 10/10 privacy rating; overlapping boards cover gaps as wood shrinks. |
| Budget realistically | Installed cedar board-on-board typically runs $30–$50 per linear foot; composite runs higher. |
| Material affects maintenance | Wood needs staining every 2–3 years; WPC/composite needs only an annual wash. |
| Hire for complex sites | Sloped terrain, long runs, or permit requirements favor a licensed professional over DIY. |
| Modernfence | Modernfence installs board-on-board fences across Western Arkansas and Eastern Oklahoma with licensed, insured crews and written estimates. |
Table of Contents
- What a board-on-board fence is and how it differs from similar styles
- Why homeowners choose board-on-board: privacy, appearance, and performance
- When board-on-board may not be the right choice
- Material choices: cedar, pressure-treated pine, vinyl, and WPC/composite
- How a board-on-board fence is built
- How to fasten board-on-board fences: fasteners and installation tips
- Typical costs and installation timelines
- How to maintain a board-on-board fence and what to expect over time
- Style and finish ideas for board-on-board fences
- DIY or hire a pro? A checklist for board-on-board fencing
- An installer’s perspective on board-on-board fencing
- Modernfence can handle your board-on-board project from estimate to installation
- Sources
What a board-on-board fence is and how it differs from similar styles
The term “board-on-board” describes a specific construction method: vertical pickets are fastened to rails in two offset layers, with each board in the second layer overlapping the seam between two boards in the first. The result is a solid wall of wood with no sightlines, even after years of seasonal movement.
That’s different from three styles homeowners often confuse it with:
- Shadowbox (semi-private): Boards alternate on opposite sides of the rails, creating airflow and a “good neighbor” look where both sides appear finished. You can see through it at an angle, so it’s not a full-privacy option. A shadowbox fence suits homeowners who want airflow and a shared aesthetic without sacrificing too much privacy.
- Stockade (board-to-board): Pickets are placed edge-to-edge on a single face of the rails. It looks like a solid fence when new, but as wood dries and shrinks, gaps open between boards. Only one side looks finished.
- Side-by-side (single-layer): Similar to stockade, boards sit on one side of the rail with no overlap. Lower cost, but gaps are inevitable and only one face looks clean.
Board-on-board is the only style that maintains privacy as wood ages and looks intentional from both the street and your yard.
Why homeowners choose board-on-board: privacy, appearance, and performance
Privacy is the primary reason. The overlapping construction means that even if individual boards shrink by a quarter inch, the second layer still covers the gap. No other wood privacy style handles seasonal movement as reliably.
The appearance benefit is just as real. Because boards are installed on both faces of the rails, neighbors see the same clean vertical lines you do. That matters on shared property lines, where a fence that looks unfinished from one side can create friction.
Performance-wise, the solid surface does offer some sound dampening compared to open or semi-open styles. Wind resistance is more nuanced. A solid fence catches more wind load than a shadowbox, which is why post sizing and rail count matter more in a board-on-board build. Properly engineered, the fence holds up well. Underbuilt, it’s the first thing to lean after a storm.
Stat to know: Board-on-board earns a 10/10 privacy rating from professional fence guides, the top score among all wood privacy styles.
When board-on-board may not be the right choice
Higher cost is the most straightforward trade-off. The double-layer construction uses noticeably more lumber than shadowbox or stockade, and installation takes longer. That combination pushes both material and labor costs up.
Structurally, the solid face catches wind like a sail. In exposed locations, that means heavier posts, deeper footings, and more concrete, all of which add cost. In freeze-thaw climates, deeper footings and reinforced posts are non-negotiable to prevent heaving and panel failure.
Moisture is another concern specific to wood builds. The overlap creates a channel where water can sit against both boards, accelerating rot if the fence isn’t sealed regularly. Composite or vinyl removes this risk almost entirely.
Red flags that suggest a different style:
- Your property sits in a high-wind corridor with no natural windbreak
- The terrain is steeply sloped, making panel alignment difficult and expensive
- Your HOA requires a “good neighbor” fence visible from both sides (shadowbox may be required)
- Budget is tight and a stockade fence would meet your privacy needs adequately
- You want airflow through the fence for garden ventilation
Material choices: cedar, pressure-treated pine, vinyl, and WPC/composite
The material you choose affects shrinkage, maintenance frequency, lifespan, and total cost over time. Here’s how the main options compare:
Cedar is the traditional choice for board-on-board. Its natural oils resist rot and insects without chemical treatment, and it takes stain beautifully. The trade-off is cost: cedar runs higher than pressure-treated pine at the lumber yard.
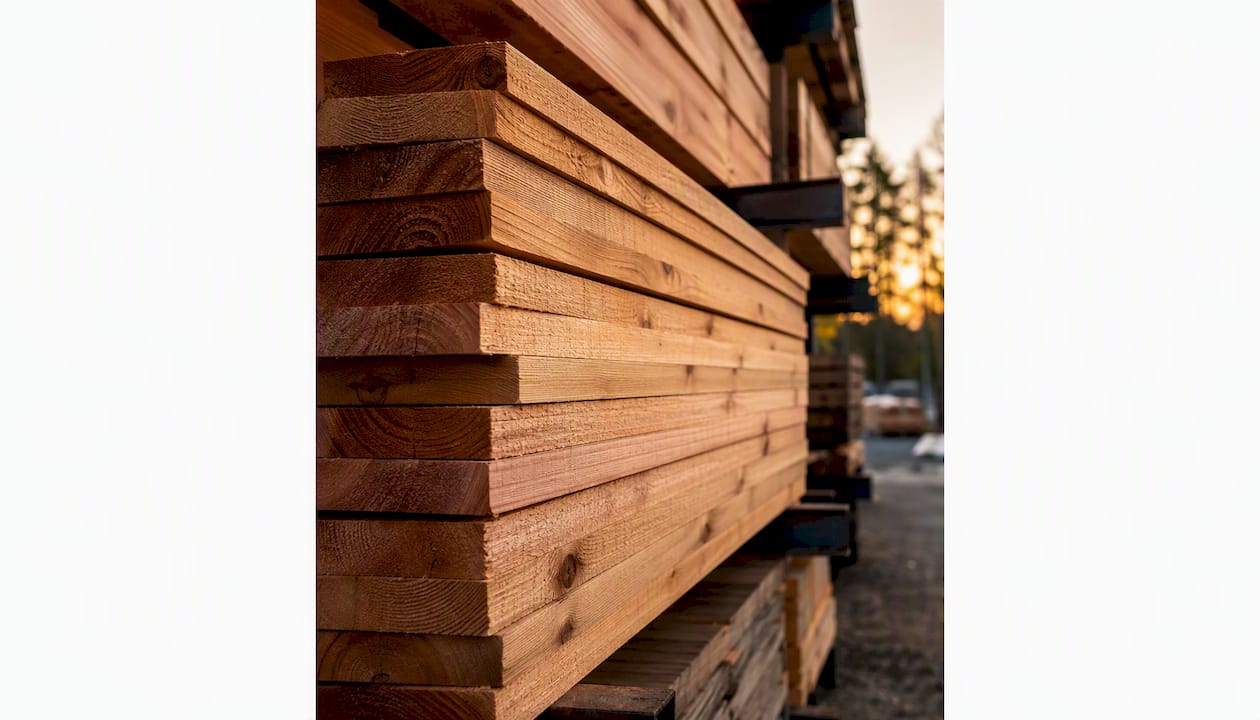
Pressure-treated pine costs less upfront and resists rot through chemical preservatives. It tends to shrink and warp more than cedar as it dries, which matters in a board-on-board layout where tight overlap is the whole point. Plan to paint or stain it within the first year.
WPC and composite panels change the maintenance equation significantly. WPC fencing nearly eliminates shrinkage in overlapping board layouts, which means the gap-prevention benefit of board-on-board construction is locked in permanently without annual sealing. The upfront cost is higher, but the long-term maintenance budget drops sharply.
Vinyl offers similar low-maintenance benefits and a clean look, though it doesn’t carry the same natural wood appearance many homeowners want.
Pro Tip: If you’re building in a humid climate like Arkansas or Oklahoma, pre-finish the overlap edges of cedar boards with a penetrating oil sealer before installation. Moisture trapped in the overlap is where rot starts, and sealing the hidden faces before they’re covered is the one step most DIYers skip.
How a board-on-board fence is built
Understanding the build sequence helps you follow progress on a job and evaluate whether a contractor’s estimate reflects real work.
Tools and materials you’ll need
- Post-hole digger or auger
- Concrete mix (one bag per post, minimum)
- Level and string line
- Circular saw or miter saw
- Nail gun or screw gun
- Galvanized or stainless fasteners
- Tape measure and chalk line
- Safety glasses and work gloves
Step-by-step sequence
- Lay out the fence line. Use stakes and string to mark post locations. Standard post spacing is 8 feet on center for a 6-foot fence.
- Dig and set posts. Dig holes to at least one-third the post height plus 6 inches for gravel drainage. A 6-foot fence needs posts set at least 2 feet deep; freeze-thaw climates call for deeper.
- Pour concrete and let it cure. Allow 24–48 hours before loading the posts with rails.
- Install rails. A standard 6-foot board-on-board fence uses three horizontal rails: one near the top, one near the bottom, and one centered. Three rails are important because the double-layer boards add weight and wind load.
- Fasten the first layer of boards. Space boards evenly across the rails, leaving a gap roughly equal to half a board’s width between each picket.
- Fasten the second (overlapping) layer. Center each board over the gap in the first layer. The overlap on each side should be at least 1 inch, and ideally 1.5–2 inches, to maintain coverage as wood moves.
- Add top cap and trim. A horizontal cap board across the top protects end grain from water and gives the fence a finished look.
For a detailed look at what professional installation involves, the wood fence installation guide from Modernfence covers structural standards and what to expect on the job.
How to fasten board-on-board fences: fasteners and installation tips
Fastener choice affects how long the fence looks good and how easy it is to repair individual boards later.
Recommended fasteners:
- Galvanized ring-shank nails: Fast to install with a nail gun, hold well in softwood. Use hot-dipped galvanized to prevent rust streaking on cedar.
- Stainless steel screws (1.5"–2.5" depending on board thickness): Slower to install but far easier to remove for repairs. In coastal or high-humidity environments, stainless is worth the premium because standard galvanized screws can corrode and stain the wood within a few years.
- Avoid bright (uncoated) fasteners: They rust quickly and leave orange streaks that are nearly impossible to remove from cedar.
Hidden vs. visible fastening: Most board-on-board fences use face-fastening (screws or nails driven through the board face into the rail). Hidden clip systems exist for composite and vinyl but add cost and complexity. For wood, face-fastening with quality stainless or hot-dipped galvanized hardware is the practical standard.
Installation tips:
- Predrill near board ends to prevent splitting, especially in cedar and hardwoods
- Drive two fasteners per board per rail to prevent twisting
- Keep fasteners at least 3/4 inch from board edges
- Wear safety glasses when using a nail gun; board-on-board work involves a lot of overhead and close-quarter nailing
Pro Tip: Pre-finish the hidden overlap edges before installation. Once the second layer is fastened, those faces are inaccessible. A coat of penetrating sealer on both contact surfaces before you nail them together adds years to the fence’s life with almost no extra time on the job.
Typical costs and installation timelines
Installed cost varies by material, region, and site conditions. These ranges reflect typical market rates and are meant to help you evaluate quotes, not replace one.
For a deeper breakdown of what drives fence installation costs, Action Fence and Deck’s cost guide covers labor, materials, and regional variables in useful detail.
Key cost drivers:
- Material choice (cedar vs. pressure-treated vs. composite)
- Number of gates (each gate adds hardware, framing, and labor)
- Site prep: tree roots, rocky soil, or slopes add excavation time
- Post depth requirements for wind exposure or freeze-thaw conditions
- Local permit fees, which vary by municipality
Timeline: A 100-linear-foot board-on-board fence typically takes a two-person crew 2–3 days from post-setting to final trim. Add 1–2 days if concrete needs to cure before rail installation, and factor in permit approval time if your municipality requires one. Difficult terrain or rocky soil can extend the timeline further.
How to maintain a board-on-board fence and what to expect over time
A wood board-on-board fence rewards consistent maintenance. Neglect it for a few years and the overlap areas become the first place rot takes hold.
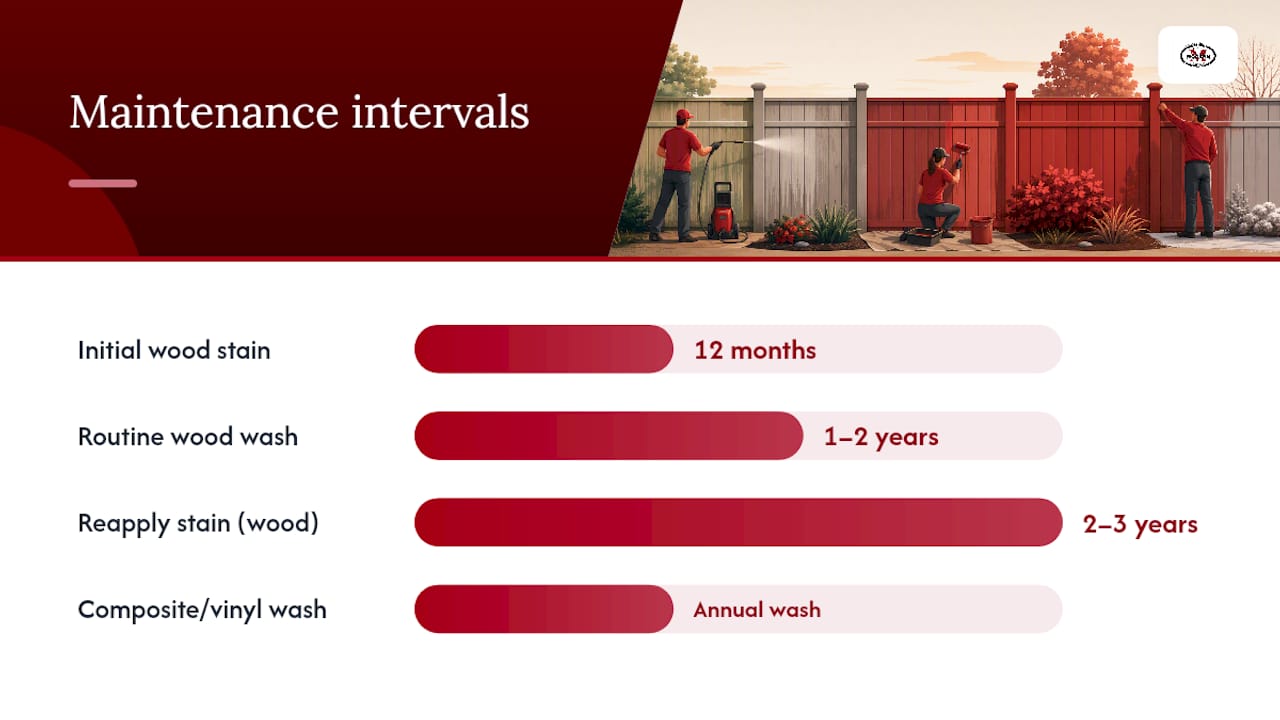
- Year 1: Inspect posts at ground level for any movement. Check fasteners for backing out. If you used pressure-treated pine, apply a stain or sealer within the first 12 months as the wood dries.
- Every 1–2 years: Wash the fence with a mild detergent or a low-pressure wash to remove mildew and dirt. Pay attention to the overlap channels where debris collects.
- Every 2–3 years (wood): Reapply stain or sealer. Cedar holds finish longer than pressure-treated pine, but neither should go more than three years between coats in a humid climate.
- Annually: Walk the fence line and check for loose boards, leaning posts, and any boards showing gray weathering or soft spots. Soft wood at the base of a board usually means moisture is wicking up from the ground.
- As needed: Replace individual boards rather than whole panels when damage is isolated. Board-on-board construction makes individual board replacement straightforward.
For composite and vinyl, the schedule simplifies to an annual wash and a fastener check. WPC composite fencing requires significantly less maintenance than natural wood over its lifetime. A full fence maintenance schedule helps you stay ahead of repairs before they become replacements.
Style and finish ideas for board-on-board fences
Board-on-board doesn’t mean one look. The construction method is fixed, but the visual result varies widely depending on board width, top treatment, and finish.
- Board width: Narrower boards (3.5") create more shadow lines and a busier texture. Wider boards (5.5"–7") read as bolder and more contemporary.
- Top cap options: A flat cap board is standard. A dog-ear cut on each picket adds a traditional look. A routed or beveled cap rail gives a more finished, architectural appearance.
- Horizontal board-on-board: The same overlapping principle applied horizontally creates a modern, ranch-style look that’s gaining popularity. It requires more precise post alignment but photographs well.
- Stain vs. paint vs. natural: Natural cedar weathers to silver-gray if left untreated, which some homeowners prefer. A semi-transparent stain preserves the wood grain while adding color. Solid paint gives the most uniform look but requires more prep work at recoat time.
- Mixed-use layouts: Board-on-board in the backyard for privacy, paired with a decorative open-style fence in the front yard, is a common and practical combination. It keeps the street-facing elevation open and welcoming while securing the private areas of the property.
DIY or hire a pro? A checklist for board-on-board fencing
Board-on-board is one of the more demanding wood fence builds. The double-layer construction, heavier post requirements, and need for precise alignment make it less forgiving than a simple stockade project.
When DIY makes sense
- You have experience setting posts in concrete and working with a level over long runs.
- Your site is flat, with no significant grade changes or buried utilities.
- You own or can rent a post-hole auger, nail gun, and miter saw.
- The run is short (under 50 linear feet) and you have a full weekend plus a helper.
- You’re comfortable pulling a permit and scheduling an inspection if your municipality requires one.
When to hire a professional
- The fence line runs along a property boundary where accuracy matters legally.
- Your site has slopes, rocky soil, or tree roots that complicate post-setting.
- You need the fence permitted, inspected, and warrantied.
- The run is long enough that a crew’s efficiency saves real money versus your time.
- You want composite or vinyl materials that require specific fastening systems.
Questions to ask any contractor
- Are you licensed and insured in this state? Can you provide proof?
- What post depth will you use, and what diameter posts for a 6-foot board-on-board fence?
- How many rails per panel, and what rail dimensions?
- What fasteners do you use, and are they hot-dipped galvanized or stainless?
- What’s your lead time, and is the timeline in the written estimate?
- Do you pull permits, or is that the homeowner’s responsibility?
- What does your warranty cover, and for how long?
Red flags: No written estimate, vague scope (“we’ll figure it out as we go”), pressure to pay more than 30% upfront, no verifiable references, or a bid significantly below every other quote. Use the residential fence contractor checklist from Modernfence to stay organized during estimate calls. You can also verify contractor credentials through BBB listings and local licensing databases before signing anything.
For more on choosing a fence contractor you can trust, Modernfence has a practical guide covering the questions that matter most.
An installer’s perspective on board-on-board fencing
Board-on-board is the style we recommend most often for shared property lines, and the reason is straightforward: it’s the only wood fence that looks intentional from both sides and stays private as it ages. Homeowners on the neighbor’s side of a stockade fence are looking at rail backs and post faces. With board-on-board, they see the same finished surface you do.
What most homeowners underestimate is the structural side. A solid fence face catches wind the way a wall does. We size posts heavier for board-on-board than for shadowbox, and we always use three rails on a 6-foot fence, not two. Cutting corners on post depth or rail count is where board-on-board fences fail in storms.
On the longevity side, the single most effective thing we do is treat the bottom of every post with a wood preservative before it goes in the ground, and we set them in concrete with a slight crown to shed water away from the post base. We also recommend homeowners do a walk-through inspection with us before final sign-off, checking post plumb, board alignment, and fastener seating. A five-minute walk-through catches the small things before they become warranty calls.
Modernfence can handle your board-on-board project from estimate to installation
Getting a board-on-board fence right means more than buying the right boards. Post depth, rail count, fastener choice, and site prep all affect whether the fence looks great in year one and still holds up in year ten.
Modernfence brings over 70 years of licensed, insured installation experience to wood fence projects across Western Arkansas and Eastern Oklahoma. We handle site surveys, material selection, post sizing for local wind conditions, and written estimates that spell out exactly what you’re getting. Our wood fence installation service covers board-on-board builds from post-setting through final trim, with follow-up maintenance guidance included.
Ready to get an accurate number for your project? Contact Modernfence for a free estimate and we’ll walk you through material options, timeline, and what the finished fence will look like on your property.
Sources
- 8 privacy fence styles ranked: board-on-board, shadowbox, stockade & more (Fence Advisors)
- Shadowbox vs. Board-on-Board wood fencing comparison (Purple Fencing Company)
- What is a board-on-board fence? Explore your board on board fencing options. (Columbus Fence Pros)
- Board-on-board vs stockade wood fence in Danbury, CT (Quality Fence CT)