
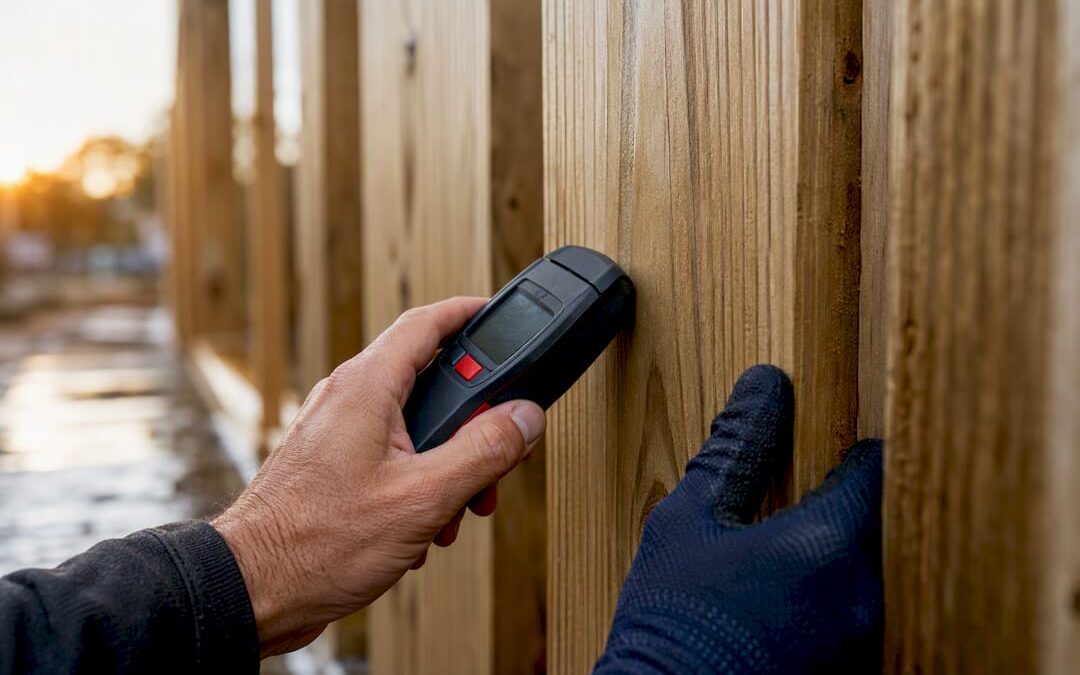
The best time to stain a fence is on a mild, dry day in late spring or early fall, when temperatures sit between 60°F and 80°F. Before anything else, confirm the wood is actually dry with a quick water-drop test. If rain isn’t in the forecast for at least 24 to 48 hours, you have a workable window.
TL;DR:
- The best weather conditions for staining a fence are days with temperatures between 60°F and 80°F, low humidity, and no rain expected within 24 to 48 hours.
- Newly installed wood needs to dry for several weeks to months, depending on wood type and climate, with moisture content below 15% before staining.
- Oil-based stains require longer drying windows than water-based stains, which cure faster and are better suited for narrow weather conditions.
- Applying stain in direct sunlight or extreme heat causes uneven absorption and peeling, so start early in the morning or late afternoon.
- Professionals use moisture testing and detailed sequencing, including back-brushing and panel-by-panel work, to ensure stain lasts longer and avoids common failures.
Table of Contents
- When to Stain a Fence: Best Seasons and Weather Conditions
- When to Stain a New Fence and How to Test Wood Moisture
- How Stain Type and Formulation Affect Timing
- Application Methods: Spray, Brush, or Roller
- How Often to Re-Stain and Signs It’s Time
- Common Mistakes That Make Timing Fail
- How Professionals Time and Apply Fence Stain
- Trust the Wood, Not the Calendar
- Get Professional Fence Staining Done Right the First Time
- Sources
- FAQ
When to Stain a Fence: Best Seasons and Weather Conditions
Late spring and early fall beat every other stretch of the calendar because the air hits a sweet spot: warm enough for stain to penetrate and cure, but not so hot that it flash-dries on the surface before soaking in. Summer heat waves and winter cold snaps both work against you, just in different ways. Extreme heat causes the stain to skin over on top of the wood instead of absorbing into the grain, while cold slows curing to a crawl and can leave the finish tacky for days.
The numbers matter more than the season label. Aim for temperatures between mild and moderate ranges suitable for staining, low to moderate humidity, and a rain-free window of at least 24 to 48 hours before you start.
Pro Tip: Don’t just check tomorrow’s forecast. Humidity and surprise showers are the real project killers, so reserve a 2 to 3 day dry window instead of gambling on a single clear day.
If you live somewhere with unpredictable weather patterns, like much of Arkansas and Oklahoma, build in extra buffer. A forecast can shift overnight, and a rushed job on borderline-dry wood tends to fail faster than a job you delayed by a week.
A few quick checks before you commit to a date:
- Confirm daytime highs will stay in the 60 to 80°F range for the full drying period, not just the day you apply stain.
- Check relative humidity. High humidity slows drying and increases the odds of blotching.
- Look at the extended forecast, not just the next 24 hours, for that full rain-free window.
- Plan to start in the morning or late afternoon. Direct midday sun heats the wood surface and interferes with even absorption.
Morning starts also give you more flexibility. If something goes wrong (a tool malfunction, an unexpected humidity spike) you still have daylight left to fix it before the stain sets.
When to Stain a New Fence and How to Test Wood Moisture
New wood needs to dry out before it can absorb stain properly, and how long that takes depends on the lumber. Pressure-treated pine typically needs the longest wait because the treatment process saturates the wood with moisture during manufacturing. Cedar and redwood dry faster since they arrive with lower moisture content, but you should never assume. Test it.
- Do the water-drop test. Sprinkle a few drops of water on the wood. If it beads up and sits on the surface, the fence is still too wet to stain. If it soaks in within about 10 seconds, you’re likely ready.
- Use a moisture meter if you want a hard number. Most contractors look for a reading under 15% before staining.
- Factor in your climate. Humid regions slow drying considerably. A fence that would be ready in six weeks in a dry climate might need 10 to 12 weeks in a humid one.
General guidance puts most new fences ready to stain somewhere between several weeks and a few months after installation, with pressure-treated lumber sometimes needing several weeks to a few months in humid climates before it’s fully cured.
Pro Tip: If you’re staining right after installation for cosmetic reasons, ask about products labeled for “wet wood” application. Most standard stains still require dry lumber, so always check the label before assuming an exception applies to your can.
How Stain Type and Formulation Affect Timing
The stain you pick determines how much of a weather window you actually need, and getting this wrong is why a lot of DIY jobs end up peeling within a year.
Oil-based and water-based stains behave differently once they hit the wood. Oil-based stains penetrate deeper and typically last longer, but they need a longer dry window and mineral spirits for cleanup. Water-based formulas dry faster and carry lower VOCs, which matters if local air quality rules restrict certain products or you’re working around a tight forecast.
Finish type changes the equation too:
- Clear and semi-transparent stains show more wood grain but wear faster, which means shorter intervals between coats.
- Semi-solid stains hide more of the wood’s natural texture while adding a longer service life.
- Solid stains behave almost like paint, offering the most UV protection and the longest stretch between recoats.
Manufacturer cure-time windows matter here. Oil-based products often list 24 to 48 hours before rain exposure is safe, while water-based versions can set up faster. If your weather window is genuinely narrow, a faster-drying water-based option gives you more margin for error than a slow-curing oil-based product. Check stain type and color options before you commit, since some formulations suit certain wood species better than others.
Application Methods: Spray, Brush, or Roller
Your timing window should shape how you apply the stain, not just when you start.
Spraying covers ground fast, which is valuable when you’re racing a narrow dry window. But spraying alone often leaves the product sitting on the surface instead of working into the grain. That’s why professionals back-brush immediately after spraying, using a brush to push the stain into the wood fibers and eliminate puddling before it dries unevenly.
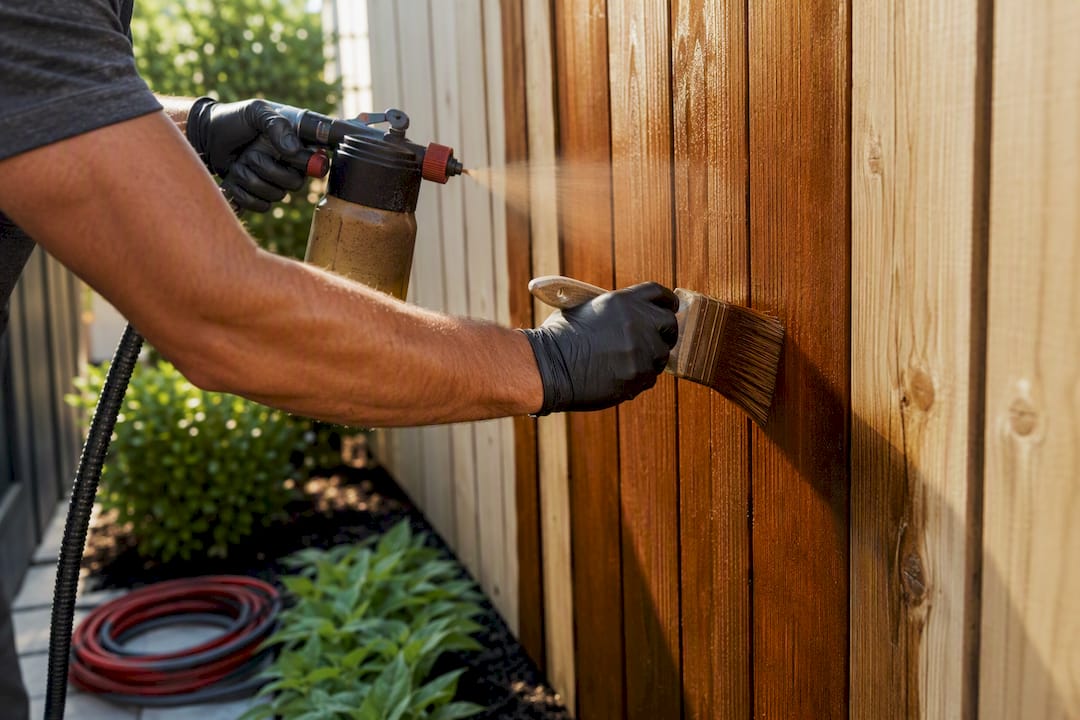
Rolling works fine on smooth, newer boards where the grain is shallow. Brushing by hand is slower but gives you more control on rough-sawn or weathered lumber, where deep grain needs manual work to get full coverage.
A few habits that keep the finish even, especially when you’re working against the clock:
- Work one panel at a time (two posts plus the boards between them) rather than jumping around the fence line.
- Maintain a wet edge as you move panel to panel to avoid visible lap marks.
- Treat end grain separately. It absorbs stain fastest and needs its own pass.
- Keep a rag handy to wipe drips before they set on hardware or concrete.
Pro Tip: Spraying then back-brushing isn’t just about looks. On rough or weathered lumber, it noticeably improves how deep the stain penetrates, which directly affects how long the finish lasts.
How Often to Re-Stain and Signs It’s Time
Re-stain frequency depends entirely on the product you used the first time. Clear sealers typically need reapplication every 1 to 2 years, semi-transparent stains every 2 to 3 years, semi-solid stains every 3 to 4 years, and solid stains every 4 to 5 years, though climate and sun exposure shift these ranges in either direction.
Watch for these signs rather than relying on a calendar alone:
- Graying wood. UV exposure breaks down the finish and leaves boards looking bleached or silvery.
- Water no longer beads on the surface. If it soaks straight in, the protective layer is gone.
- Checking or small surface cracks. These let moisture in and accelerate wood damage if ignored.
- Flaking or peeling. A clear sign the previous coat has failed and bare wood is exposed.
South-facing and west-facing fence sections that catch full sun all day will need attention sooner than shaded stretches along a tree line or a neighbor’s property. A simple twice-a-year walk-around, once in spring and once in fall, catches these signs early enough to schedule a recoat before the wood itself starts to suffer. For a fuller maintenance routine, see how to maintain stained wood fence panels.
Common Mistakes That Make Timing Fail
Most stain failures trace back to one of a handful of avoidable mistakes, and nearly all of them are timing errors in disguise.
- Staining wet wood. Moisture trapped under a fresh coat has nowhere to go, which causes peeling, blistering, and even early rot. Always run the water-drop test before you open a can.
- Working in direct sun or extreme heat. High surface temperatures cause the stain to dry on top of the wood before it penetrates, leaving a thin film that peels within months. Schedule around midday sun and pick a mild-temperature day.
- Over-applying stain. More product doesn’t mean better protection. Pooled stain dries into a sticky, uneven film. A thin, worked-in coat outperforms a heavy one every time, and end grain should get its own light pass rather than a heavy soak.
Pro Tip: Before you start, run through a short checklist: wood is clean, wood is dry, damaged boards are repaired, the forecast shows a 2 to 3 day dry window, and your sprayer, brushes, and rags are ready to go.
How Professionals Time and Apply Fence Stain
Crews with decades of field experience don’t just check a calendar. They test moisture on-site the same way homeowners should, using a water-drop test or a meter before committing to a start date, and they build projects around multi-day dry windows rather than a single clear afternoon.
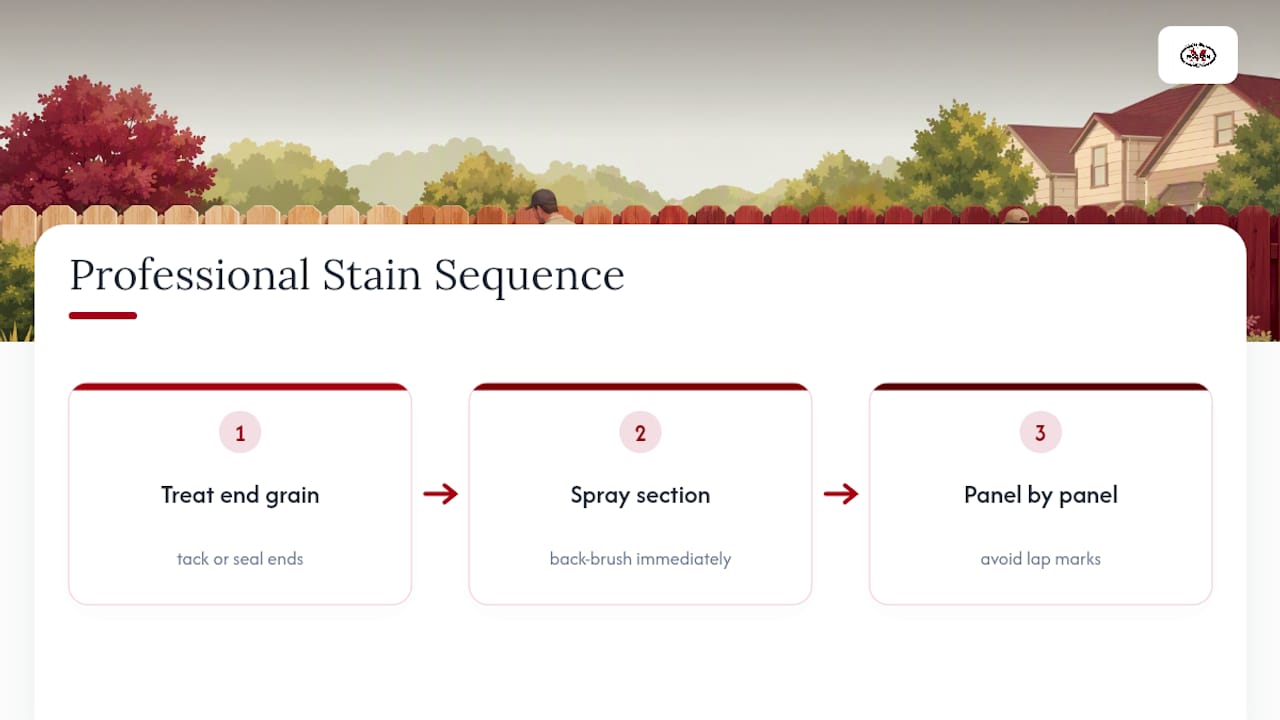
The details that separate a professional job from a rushed DIY weekend usually come down to sequencing. Pros treat end grain separately since it absorbs the fastest and fails first if neglected. They back-brush every sprayed section immediately, and they work the fence line panel by panel to avoid lap marks and uneven color.
Hiring out makes the most sense on larger fence lines, projects squeezed into a short weather window, or jobs where you want a workmanship guarantee behind the result. Experienced professionals have applied these timing and technique standards based on long experience, which is long enough to know that rushing the wood, not the schedule, is what actually causes callbacks. For the full step-by-step process, see how to stain a fence for lasting protection.
Trust the Wood, Not the Calendar
Most staining guides lead with the season. I’d flip that. The calendar tells you when conditions are usually right, but the wood itself tells you whether they’re right today. A late-spring day that looks perfect on paper can still mean a fence that beads water like a car windshield after rain.
Run the water-drop test before every project, even if the forecast checks every box. Reserve a two to three day window instead of banking on one dry afternoon, and start in the morning so you have daylight left if something changes. If you want the deeper how-to details behind these calls, Modernfence’s staining guide walks through the full process.
— mark
Get Professional Fence Staining Done Right the First Time
Hiring a professional is an alternative to guessing your way through a DIY stain job. Professionals time this work based on experience, understand how local humidity affects drying, and carry insurance to back the job.

Hiring a professional means someone else handles the moisture testing, the weather-window planning, and the back-brushing technique that keeps stain from pooling on rough lumber. That’s the difference between a finish that lasts and one that peels by next summer. If your fence is showing gray boards, cracked wood, or water that no longer beads, request an estimate through Modernfence’s fence staining services and get a crew out to check moisture levels and schedule the work around the next good weather window.
Sources
- When Is the Best Time to Stain a Fence?
- Fence Staining 101: When to Stain, Which Products to Use & How to Apply
- Best Time to Stain a Fence: A Comprehensive Guide
- How to Stain a Wood Fence | Sherwin-Williams
FAQ
When Should You Not Stain a Fence?
Skip staining when the wood is wet, rain is forecast within 24 to 48 hours, or temperatures fall outside the 60 to 80°F range. Direct midday sun and high humidity above 60 to 70% also make it a bad time to start.
Can You Stain a 20-Year-Old Fence?
Yes, as long as the wood underneath is still structurally sound and not rotted through. Clean it thoroughly, let it dry completely, sand or scrape off any flaking finish, and run the water-drop test before applying new stain.
Is It Better to Roll or Brush Stain on a Fence?
Brushing gives better control and penetration on rough or weathered lumber, while rolling works fine on smoother, newer boards. Many professionals spray for speed and then back-brush immediately to combine both advantages.
Is It Ever Too Late to Stain a Fence?
It’s rarely too late unless the wood has already rotted or structurally failed. Even an older, grayed fence can usually be restored with proper cleaning, repairs, and a fresh coat applied under the right weather conditions.